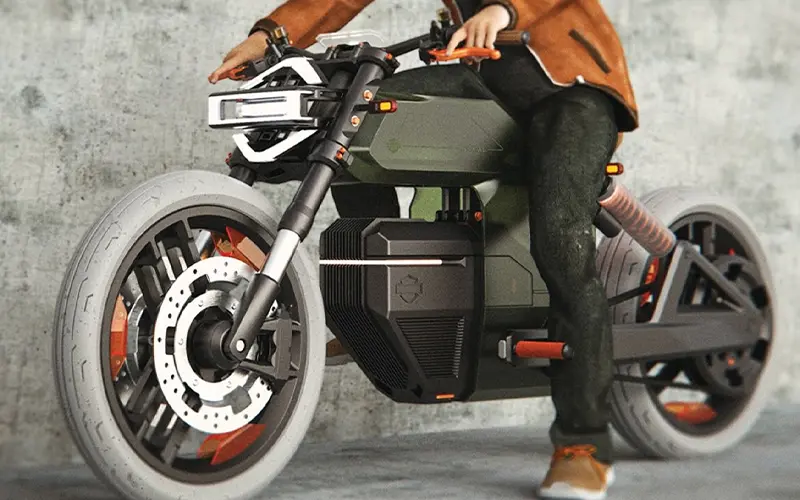

There’s something almost poetic about working on your own motorcycle. It’s not just about keeping your ride in top condition—it’s about connecting with your machine on a deeper level. Every biker knows that feeling when the engine hums just right, the throttle responds perfectly, and you feel like the road belongs to you. But let’s be honest: to keep that sweet spot alive, your bike needs a little love and attention.
One of the most overlooked yet essential tasks in motorcycle maintenance is changing the oil filter. It might not sound glamorous, but trust me—it’s vital if you want to keep your engine running like a dream and avoid unnecessary wear and tear. Whether you’re a weekend rider, a daily commuter, or someone who’s just getting started on their two-wheeled renaissance, learning how to change your motorcycle oil filter is a skill that’ll save you time, money, and give you a newfound respect for your machine.
And hey, if you’re in need of top-tier parts for your bike, don’t forget to check out Aliwheels for the best motorcycle oil filters and other must-have accessories.
Why You Should Never Ignore Changing Your Motorcycle Oil Filter
First things first—why is changing your oil filter such a big deal?
Think of the oil filter as your bike’s guardian angel. Its main job is to catch all the nasty stuff—metal particles, dirt, sludge—that builds up in the oil as your engine runs. This prevents these harmful particles from circulating through the engine and causing damage. Over time, however, the filter fills up and loses its effectiveness. When that happens, your engine has to work harder, which can lead to reduced performance and, worse, long-term damage.
Fresh oil keeps your engine lubricated and running smoothly, but without a clean filter, even the best oil can’t do its job. That’s why changing your oil filter isn’t just a routine chore—it’s essential to keeping your motorcycle performing at its peak.
When Should You Change Your Motorcycle Oil Filter?
Here’s the golden question: how often should you swap out your oil filter?
The answer depends on your bike, how often you ride, and the kind of conditions you’re riding in. As a general rule, most manufacturers recommend changing the oil filter every time you change the oil, which typically falls between 3,000 to 5,000 miles. But if you’re frequently riding in dusty environments, doing long trips, or pushing your engine hard, you might need to change it more often.
Pro tip: Always refer to your motorcycle’s owner’s manual for specific guidelines. Every bike is different, and the manufacturer will always give you the best advice for your specific model.
What You’ll Need Before You Start
Before diving into the nitty-gritty, make sure you’re fully prepared. There’s nothing worse than getting halfway through a job and realizing you’re missing a tool. Here’s a short checklist of what you’ll need:
- New Oil Filter: Make sure it’s the right fit for your bike. You can find high-quality options at Aliwheels.
- Fresh Motorcycle Oil: Always use oil that meets your manufacturer’s recommendations.
- Socket Wrench Set: For removing bolts and drain plugs.
- Oil Filter Wrench: Super handy for getting the old filter off without a fight.
- Drain Pan: You’ll need this to catch the old oil.
- Gloves and Rags: Things are going to get messy—be prepared.
- New Drain Plug Washer: This ensures a tight seal when you replace the plug.
Once you’ve got everything, you’re ready to get your hands dirty.
Step-by-Step: Changing Your Motorcycle Oil Filter Like a Pro
1. Warm Up Your Engine
Start your bike and let it idle for about five minutes. Warm oil flows better than cold oil and helps flush out more contaminants. Just don’t let it get too hot—you don’t want to burn yourself during the process.
2. Get Your Bike Secure
Make sure your motorcycle is upright and stable. If you have a center stand or paddock stand, use it. A stable bike not only helps with draining the oil completely but also keeps you safe during the process.
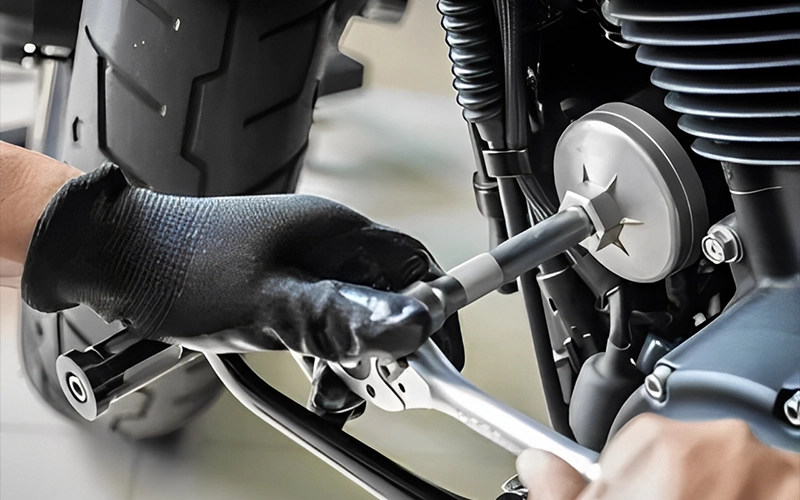
3. Locate the Oil Drain Plug and Filter
The drain plug is typically located at the bottom of the engine, and the oil filter can usually be found on the side of the engine. If you’re unsure, check your owner’s manual. Knowing exactly where these components are saves you a lot of hassle later.
4. Drain the Old Oil
Position your drain pan under the plug and use your socket wrench to loosen it. Let the old oil drain completely—this can take a few minutes. This is the perfect time to check the color and consistency of your oil. If it’s unusually dark or sludgy, it might be time to change your oil more frequently.
5. Remove the Old Oil Filter
Once the oil has drained, it’s time to remove the old oil filter. Use the oil filter wrench if it’s stuck—just be gentle to avoid damaging any surrounding parts. Be prepared for some residual oil to spill out as you remove it.
6. Prepare the New Filter
Before installing the new oil filter, apply a light coat of fresh oil to the rubber gasket on the filter. This helps create a proper seal and makes it easier to remove the filter next time around.
7. Install the New Filter and Replace the Drain Plug
Screw on the new filter by hand until it’s snug, then give it an extra quarter-turn for a solid seal. Replace the drain plug with a new washer if needed and tighten it securely—but don’t overtighten it, or you risk stripping the threads.
8. Add Fresh Oil
Using a funnel, pour in the new oil according to your manufacturer’s recommendations. Once filled, let the bike idle for a few minutes to circulate the new oil through the engine and filter. Check for any leaks around the drain plug and oil filter.
9. Check the Oil Level
After letting the engine rest for a minute, check the oil level using the dipstick or sight glass. Add more oil if necessary to ensure it’s at the recommended level.
10. Clean Up and Dispose of Old Oil Properly
Dispose of the old oil and filter responsibly—most auto parts stores will take used oil for recycling. Wipe down any spills on your bike, and you’re good to go.
Common Mistakes to Avoid When Changing Your Oil Filter
Even seasoned riders can slip up now and then. Here are some common mistakes to watch out for:
- Overtightening the Oil Filter: This can damage the rubber seal and make the filter almost impossible to remove next time.
- Using the Wrong Filter: Always double-check the specs for your bike before purchasing a filter.
- Forgetting to Replace the Drain Plug Washer: This tiny detail can lead to leaks if overlooked.
- Not Adding Enough Oil: Always measure and check the oil level after refilling.
The Aftermath: How Your Bike Benefits From a Fresh Oil Filter
Once the job’s done and you hit the road again, you’ll likely notice the difference immediately. A clean oil filter means your engine will run smoother, the throttle response will feel sharper, and you might even notice better fuel efficiency. It’s a small job that makes a big difference—and it’s essential if you want to extend the life of your engine and keep your bike in prime condition.
Regular maintenance doesn’t just keep your motorcycle healthy; it strengthens your connection with your machine. It’s about understanding how every component works together and making sure everything runs in harmony.
Upgrade Your Ride with the Right Parts
Now that you know how to change your motorcycle oil filter like a pro, why not take it a step further? At Aliwheels, you’ll find high-quality oil filters and other essential parts that’ll help keep your ride performing at its best.
Your bike deserves the best care—and so do you. Embrace the renaissance of motorcycle maintenance, learn the ins and outs of your machine, and hit the road with confidence, knowing your engine is running clean and strong.
It’s not just maintenance—it’s an act of love for the open road.